Information about: Always use main image?
Posted: October 30, 2011 Filed under: PGV Docs 文件 Leave a comment »This option lets you override the usual selection for a thumbnail image.
The GEDCOM has a configuration option that specifies whether PhpGedView should send the large or the small image to the browser whenever the current page requires a thumbnail. The «Always use main image?» option, when set to Yes, temporarily overrides the setting of the GEDCOM configuration option, so that PhpGedView will always send the large image. You cannot force PhpGedView to send the small image when the GEDCOM configuration specifies that large images should always be used.
PhpGedView does not re-size the image being sent; the browser does this according to the page specifications it has also received. This can have undesirable consequences when the image being sent is not truly a thumbnail where PhpGedView is expecting to send a small image. This is not an error: There are occasions where it may be desirable to display a large image in places where one would normally expect to see a thumbnail-sized picture.
You should avoid setting the «Always use main image?» option to Yes. This choice will cause excessive amounts of image-related data to be sent to the browser, only to have the browser discard the excess. Page loads, particularly of charts with many images, can be seriously slowed.
Married name
Posted: October 27, 2011 Filed under: Action, Screenshots 图解 Leave a comment »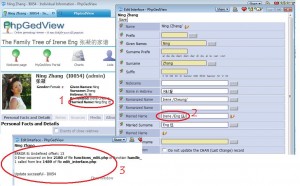 In the Married Surname field I entered Eng 伍; Save
PGV automatically filled Ning. See the red circle 1: Married Name: Ning Eng 伍
I went back to type in Irene and deleted Ning – see red circle 2: Irene /Eng 伍/
After clicking Save I got this error message: see red circle 3 and the Married Name field would disappear on the individual display page/screen (above the Personal Facts and Details) – not shown here.
Alias
Posted: October 26, 2011 Filed under: Screenshots 图解 Leave a comment »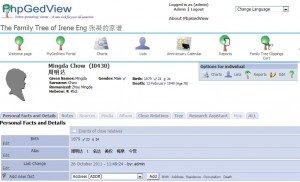
.
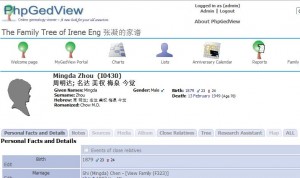
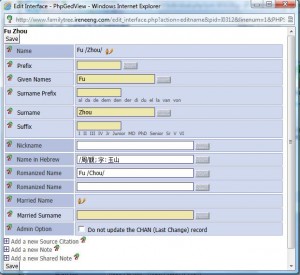
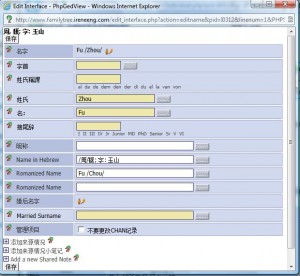
The left image has Alias (imported fm FTM, with NJ Star Communicator turned on). The image on the right is current where I jammed all Chinese names into the Hebrew Name field – bit overwhelming. Aesthetically, I prefer the left because the name field isn’t too jam packed and Alias is part of the display on the screen.
.
The thread on PGV forum that began on Dec 19, 2010 (April 3, 2011, etc.) warned:
.. shouldn’t bother with AKA or Alias — it’s not very well supported and you only have the possibility of adding one alternate name.
Chinese names 名字
Posted: October 26, 2011 Filed under: Action, Screenshots 图解 Leave a comment »I’ve experiment with various combinations for displaying Chinese names. To get the following results, I did this:
.
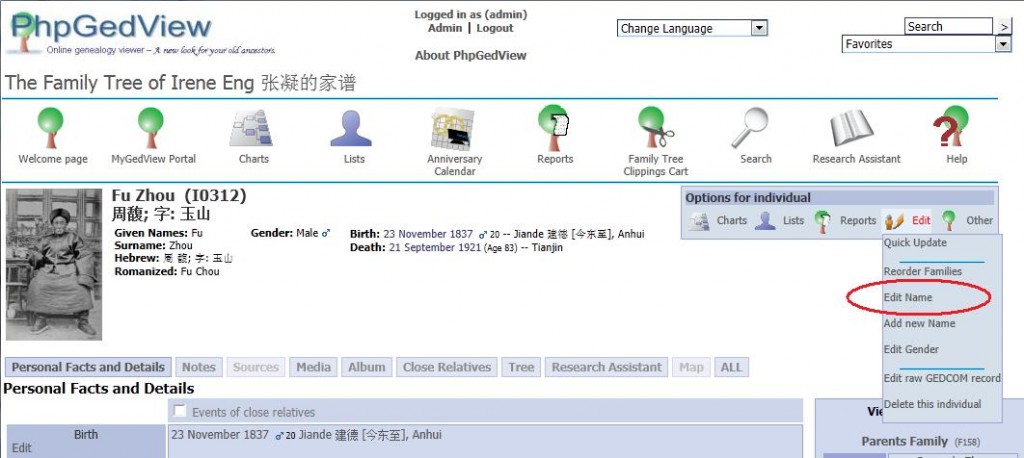
- Given Names – English (pinyin)
- Surname – English
- Nickname – English
- Hebrew Given Names – 名; 字 zi; 号 hao
- Hebrew Surname – 姓
- Romanized Given Names – Old/known (Wade-Giles)
- Romanized Surname – Wade-Giles .. also known
晚号 an assumed name or alternative name taken at older age
谥号 shi hao: posthumous title
Names 姓名
Posted: October 26, 2011 Filed under: PGV Docs 文件 Leave a comment »Alias
Chinese names
Married name
Thread about names in PGV forum
Names
Last Name is a relatively recent historical invention. Depending on the country, few hundred years ago people were known by their names (John) with possible addition of their professions Smith or a place where they lived (Anaximenes of Miletus). Later those nicknames were converted into the family names, which in some countries can be very complex. PGV gives you the tools to enter the names using the following fields:
- Name
- This is a display field, which will show the name as you enter data in other fields. By convention, the family name is enclosed in slashes „/” – this is how Gedcom recognizes the last name. You should try to make this name look like the usual way of writing the person’s name, for example John D /Smith/, Gustav /von Aschenbach/, Arthur /Brown/ Jr, Dr. Anna /Clark/ etc.
- Prefix
- Name prefix, for example Mr, Dr, Sir, Don etc.
- Given Names
- One or more given names separated by spaces. If only initial is known, enter it here as well. You can indicate the preferred name with an asterisk after the name, e.g. John Arhur*; in display the preferred name will be underlined.
- Surname Prefix
- Prefix that comes before the surname, like in German or Dutch Von, van, van der etc. Some common prefixes are already spelled out for you , just click on the name: al, da, de, den, dem, der, di, du, el, la, van, von. The prefix will be displayed together with the surname like in Gustav /von Aschenbach/.
- Surname
- Surname or most commonly used surname (if there are several), or surname acquired at birth, if applicable.
- Suffix
- Part that come after surname; typical suffixes are also spelled out for your convenience, Jr, Sr, I, II, III, IV, MD, PhD, but you can add your own.
- Nickname
- Many people are commonly known by their nickname rather than first name; a nickname is usually acquired later in life, and is not part of formal name.
- Married Name
- Like Name it is an display field showing a complete Married Name
- Married Surname
- Typically after marriage wife’s or husband’s names change. You can enter here the name of a person as known after marriage. In searching for (or listing) people, the person can now be located both by her/his Surname and Married Name, which makes it easier to find him/her (and also causes double listing).
If you use non-Latin alphabets such as Hebrew, Greek, Cyrillic or Arabic, and the administrator enabled additional tags, you will also see fields like Romanized, Phonetic, Hebraic etc., allowing you to store different versions of the name in several alphabets.
Multiple names
It is possible to add additional names to the person record. The preferred name should be listed first, and it is useful to add a note explaining the circumstances of changing the name. It is also possible to enter multiple Married Names (see Married Name above)
Editing / Deleting Names
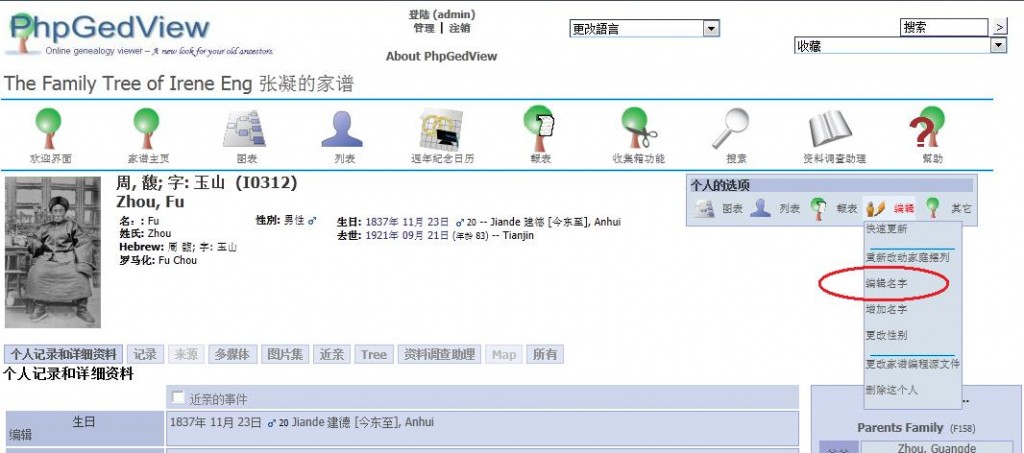
The Options for individual menu allows one to edit any aspect of individual name. It is also possible to delete a name. When you delete the name, you do not delete the individual, he still exists with all the family link – his/her name will be listed as unknown.
User Admin: Access Level
Posted: October 22, 2011 Filed under: Screenshots 图解 Leave a comment »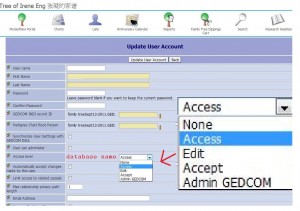 Granting the user the degree of access within the database/tree in the Admin section:
Access Level database name:
– None
– Access
– Edit
– Accept
– Admin GEDCOM
The user can have different access and editing privileges for each genealogical database in the system.
- None: The user cannot access the private data in this GEDCOM.
- Access: The user cannot edit or accept data into the database but can see the private data.
- Edit: The user can edit values but another user with Accept privileges must approve the changes before they are added to the database and made public.
- Accept: The user can edit. He can also edit and approve changes made by other users.
- Admin GEDCOM: The user edit and approve changes made by other users. The user can also edit configuration and privacy settings for this GEDCOM.
System administrators, identified through the User can administer check box, are automatically given Admin GEDCOM privileges.
Nov 2, 2011:
“Genealogical database” is the database where all of the information about your ancestors, relatives, etc. is stored. Sometimes the documentation refers to “GEDCOM”, but that’s not strictly speaking correct.
“System” is the server hardware and software, including PhpGedView.
Timeline
Posted: October 18, 2011 Filed under: Screenshots 图解 Leave a comment »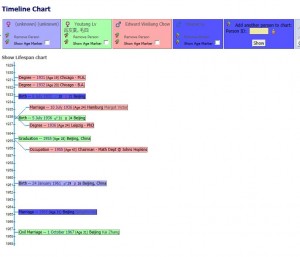
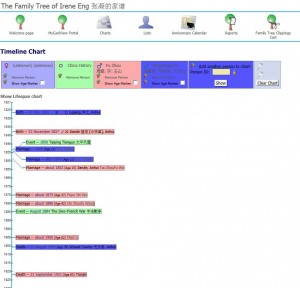
The last option on the Charts
Add new fact
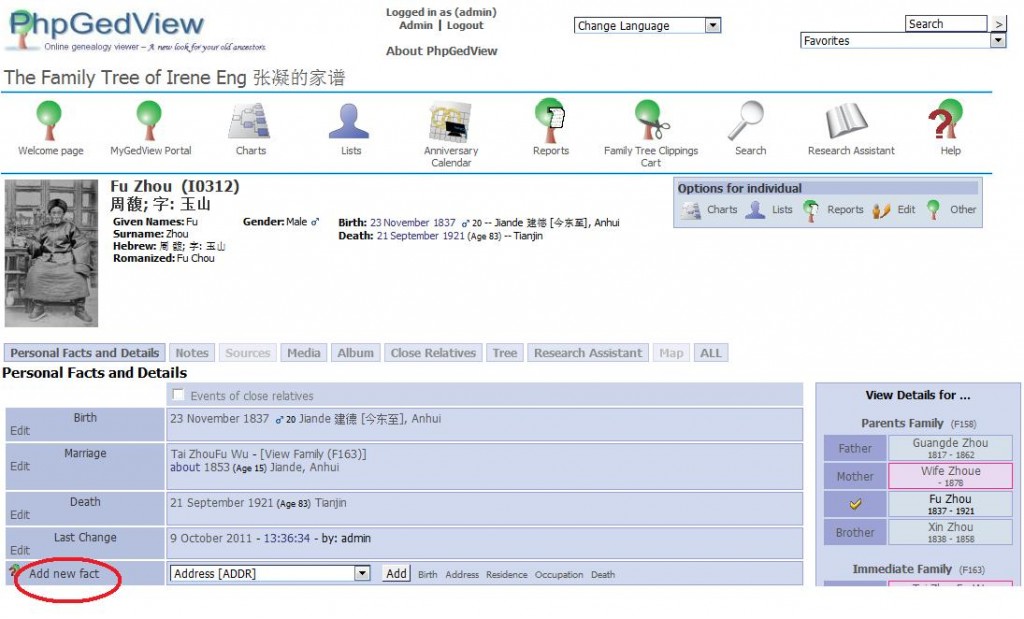
Posted: October 18, 2011 Filed under: PGV Docs 文件, Screenshots 图解 Leave a comment »At the bottom left is where you can add a fact to the personal record being edited.
First choose a fact from the drop-down list, then click the Add button. All possible facts that you can add to the database are in that drop-down list.
ADD CUSTOM FACT
If you can’t find the fact that you want to add in the list of GEDCOM facts, you can enter a custom fact as well.
Entering a custom fact is just as simple as entering one of the pre-defined ones. The only difference is that you have to name the fact instead of picking its name from a list. You have to do this in the top field: Type
ADD FROM CLIPBOARD
PhpGedView allows you to copy up to 10 facts, with all their details, to a clipboard. This clipboard is different from the Clippings Cart that you can use to export portions of your database.
You can select any of the facts from the clipboard and copy the selected fact to the Individual, Family, Media, Source, or Repository record currently being edited. However, you cannot copy facts of dissimilar record types. For example, you cannot copy a Marriage fact to a Source or an Individual record since the Marriage fact is associated only with Family records.
This is very helpful when entering similar facts, such as census facts, for many individuals or families.
DATES IN A GEDCOM FILE
Although the date field allows for free-form entry (meaning you can type in whatever you want), there are some rules about how dates should be entered according to the GEDCOM 5.5.1 standard.
- A full date is entered in the form DD MMM YYYY. For example, 01 MAR 1801 or 14 DEC 1950.
- If you are missing a part of the date, you can omit that part. E.g. MAR 1801 or 14 DEC.
- If you are not sure or the date is not confirmed, you could enter ABT MAR 1801 (abt = about), BEF 20 DEC 1950 (bef = before), AFT 1949 (aft = after)
- Date ranges are entered as FROM MAR 1801 TO 20 DEC 1810 or as BET MAR 1801 AND 20 DEC 1810(bet = between)The FROM form indicates that the event being described happened continuously between the stated dates and is used with events such as employment. The BET form indicates a single occurrence of the event, sometime between the stated dates and is used with events such as birth.
Imprecise dates, where the day of the month or the month is missing, are always interpreted as the first or last possible date, depending on whether that imprecise date occurs before or after the separating keyword. For example, FEB 1804 is interpreted as 01 FEB 1804 when it occurs before the TO or AND, and as 29 FEB 1804 when it occurs after the TO or AND.
Be sure to enter dates and abbreviations in English, because then the GEDCOM file is exchangeable and PhpGedView can translate all dates and abbreviations properly into the currently active language. Furthermore, PhpGedView does calculations using these dates. If improper dates are entered into date fields, PhpGedView will not be able to calculate properly.
You can click on the Calendar icon for help selecting a date.
GENERAL INFO ABOUT ADDING
When you have added a fact, note, source, or multimedia file to a record in the database, the addition still has to be approved by a user who has Accept rights.
Until the changes have been Accepted, they are identified as “pending” by a differently colored border. All users with Edit rights can see these changes as well as the original information. Users who do not have Edit rights will only see the original information. When the addition has been Accepted, the borders will disappear and the new data will display normally, replacing the old. At that time, users without Edit rights will see the new data too.
Source: add new
Posted: October 17, 2011 Filed under: Screenshots 图解 Leave a comment »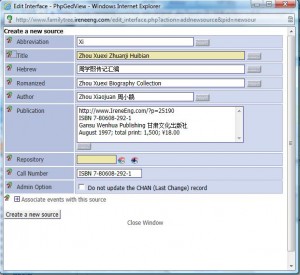 Create a new source
Abbreviation
Title: [English or pinyin + Chinese]
Hebrew: [Chinese needed?]
Romanized: [English trans of original title]
Author:
Publication:
Repository:
Call Number: [ISBN??]
Admin Option:
Associate events with this source
Note: add a new/edit shared
Posted: October 17, 2011 Filed under: Screenshots 图解 Leave a comment »This screenshot is from
.
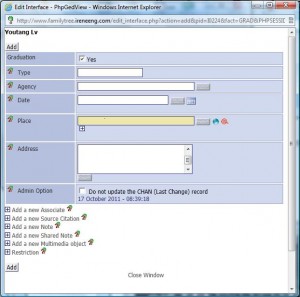 Graduation
Type
Agency
Date
Place
Address
Admin Option
- Add a new Associate
- Add a new Source Citation
- Add a new Note
- Add a new Shared Note
- Add a new Multimedia object
- Restriction
.
In details:
- Add a new Associate: Add a new Associate allows you to link a fact with an associated person in the site. This is one way in which you might record that someone was the Godfather of another person.
- Add a new Source Citation: This section allows you to add a new source citation to the fact that you are currently editing.
In the Source field you enter the ID for the source. Click the Create a new source link if you need to enter a new source. In the Citation Details field you would enter the page number or other information that might help someone find the information in the source. In the Text field you would enter the text transcription from the source. - Add a new Note: This section allows you to add a new Note to the fact that you are currently editing. Notes are free-form text and will appear in the Fact Details section of the page.
- Add a new Shared Note
- Add a new Multimedia object
- Restriction
Shared notes, like regular notes, are free-form text. Unlike regular notes, each shared note can be linked to more than one person, family, source, or fact.
By clicking the appropriate icon, you can establish a link to an existing shared note or create a new shared note and at the same time link to it. If a link to an existing shared note has already been established, you can also edit that note’s contents.
- Link to an existing shared note If you already know the ID number of the desired shared note, you can enter that number directly into the field. When you click the Find Shared Note icon, you will be able to search the text of all existing shared notes and then choose one of them. The ID number of the chosen note will be entered into the field automatically. You must click the Add button to update the original record.
- Create a new shared note When you click the Create a new Shared Note icon, a new window will open. You can enter the text of the new note as you wish. As with regular notes, you can enter URLs. When you click the Save button, you will see a message with the ID number of the newly created shared note. You should click on this message to close the editing window and also copy that new ID number directly into the ID number field. If you just close the window, the newly created ID number will not be copied automatically. You must click the Add button to update the original record.
- Edit an existing shared note When you click the Edit Shared Note icon, a new window will open. You can change the text of the existing shared note as you wish. As with regular notes, you can enter URLs. When you click the Save button, the text of the shared note will be updated. You can close the window and then click the Save button again. When you change the text of a shared note, your change will be reflected in all places to which that shared note is currently linked. New links that you establish after having made your change will also use the updated text.
Recent Comments